로그인뷰 생성하기
1. src에 Account 디렉터리를 생성하고 LoginView.vue 파일을 생성합니다.
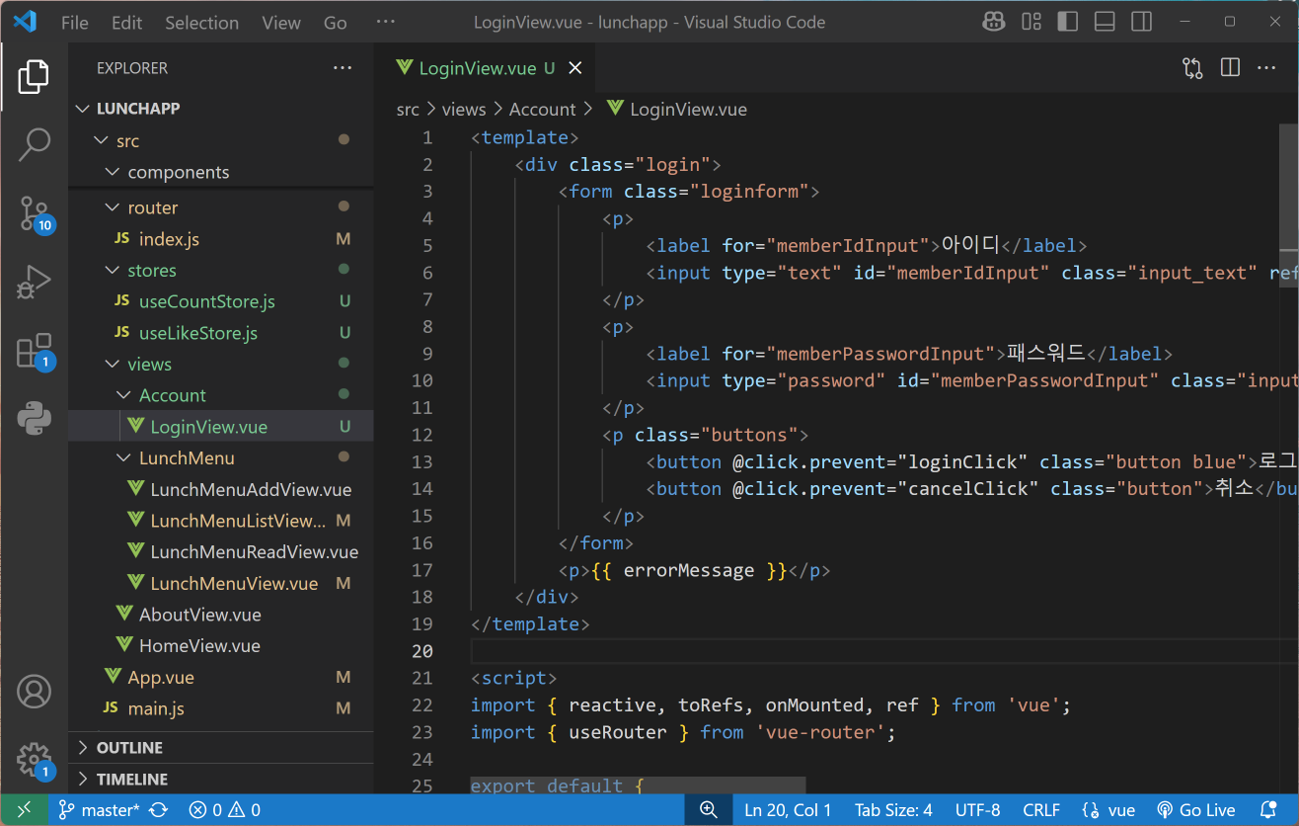
<template>
    <div class="login">
        <form class="loginform">
            <p>
                <label for="memberIdInput">아이디</label>
                <input type="text" id="memberIdInput" class="input_text" ref="memberIdInput" v-model.trim="memberId" placeholder="아이디를 입력하세요." />
            </p>
            <p>
                <label for="memberPasswordInput">패스워드</label>
                <input type="password" id="memberPasswordInput" class="input_text" ref="memberPasswordInput" v-model.trim="memberPassword" placeholder="패스워드를 입력하세요." />
            </p>
            <p class="buttons">
                <button @click.prevent="loginClick" class="button blue">로그인</button>
                <button @click.prevent="cancelClick" class="button">취소</button>
            </p>
        </form>
        <p>{{ errorMessage }}</p>
    </div>
</template>

<script>
import { reactive, toRefs, onMounted, ref } from 'vue';
import { useRouter } from 'vue-router';

export default {
    name : 'LoginView',
    setup() {
        const router = useRouter();

        const state = reactive({
            memberId: "",
            memberPassword: "",
            errorMessage: ""
        });

        const memberIdInput = ref(null);
        const memberPasswordInput = ref(null);

        function loginClick() {
            if (state.memberId == "") {
                alert("아이디를 입력하세요.");
                memberIdInput.value.focus();
                return;
            } else if (state.memberPassword == "") {
                alert("패스워드를 입력하세요.");
                memberPasswordInput.value.focus();
                return;
            }
        }
        function cancelClick() {
            router.back();
        }

        onMounted(()=>{
            memberIdInput.value.focus();
        });

        return {
            ...toRefs(state),
            loginClick,
            cancelClick,
            memberIdInput,
            memberPasswordInput
        }
    }
};
</script>

<style scoped>
.login { width:800px; margin:20px auto; }
.loginform { width:400px; margin:auto; }
.loginform p > label { display:inline-block; width:100px; font-size:14px; padding-right:10px; }
.loginform p > .input_text { width:200px; font-size:14px; height:32px; }
.buttons { position:relative; height:32px; margin-top:20px; }
.buttons > .button { overflow:visible; cursor:pointer; min-width:125px; height:32px; margin:0 2px; padding:0 15px; line-height:32px; font-size:14px; border:1px solid #dfdfdf; background:#fff; border-radius:10px; }
.buttons > .button.blue { color:#fff; border-color:#0099d2 !important; background:#0099d2 !important; }
</style>
2. src\router\index.js에서 로그인을 추가합니다.
import LoginView from '@/views/Account/LoginView.vue'

:
const routes = [
  :
  {
    path: '/login',
    name: 'Login',
    component: LoginView
  }
]
:
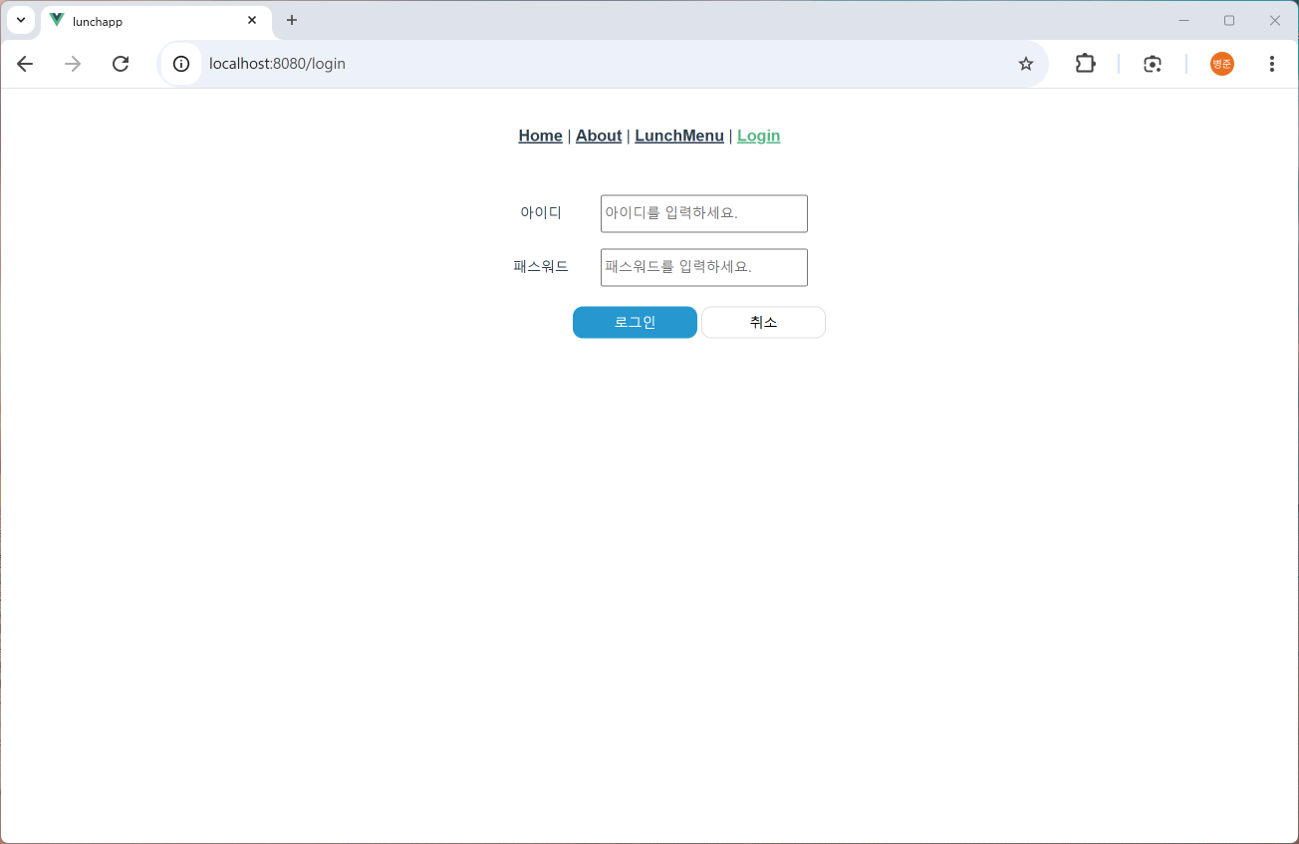
3. 웹 브라우저에서 확인하기 (http://localhost:8080/login)
Login Store(로그인 스토어) 생성
1. src\stores에 useLoginStore.js 파일을 생성합니다.
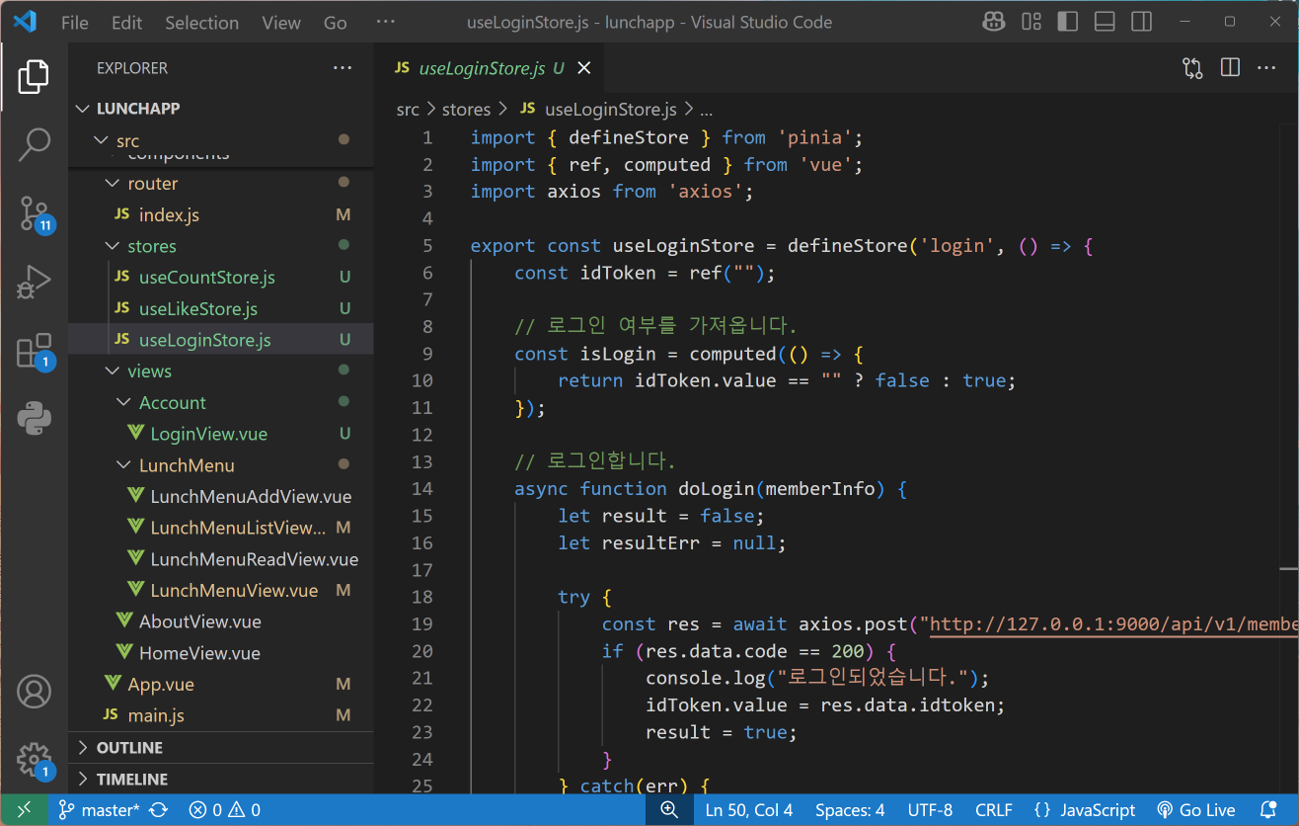
import { defineStore } from 'pinia';
import { ref, computed } from 'vue';
import axios from 'axios';

export const useLoginStore = defineStore('login', () => {
    const idToken = ref("");

    // 로그인 여부를 가져옵니다.
    const isLogin = computed(() => {
        return idToken.value == "" ? false : true;
    });

    // 로그인합니다.
    async function doLogin(memberInfo) {
        let result = false;
        let resultErr = null;

        try {
            const res = await axios.post("http://127.0.0.1:9000/api/v1/member/login", memberInfo);
            if (res.data.code == 200) {
                console.log("로그인되었습니다.");
                idToken.value = res.data.idtoken;
                result = true;
            }
        } catch(err) {
            // 400, 401, 500 에러 처리
            console.log(err);
            if (!err.response) {
                err.response = {
                    data:{"result":"fail", "code":401, "message":"사용자가 없습니다.", idtoken: ""}
                };
            }
            resultErr = err.response.data;
        }

        return new Promise((resolve, reject) => {
            if (result) {
                resolve();
            } else {
                reject(resultErr);
            }
        });
    }

    return {
        idToken,
        isLogin,
        doLogin
    }
});
2. src\Account\LoginView.vue 파일을 수정합니다.
<script>
:
import { useLoginStore } from '@/stores/useLoginStore';

export default {
    name : 'LoginView',
    setup() {
        :

        const loginStore = useLoginStore();

        function loginClick() {
            :

            const memberInfo = { id: state.memberId, password: state.memberPassword };
            loginStore.doLogin(memberInfo).then(() => {
                router.replace({name : 'home'});
            }).catch((err) => {
                state.errorMessage = err.message;
            });
        }
        :

    }
};
</script>
3. 웹 브라우저에서 확인하기 (http://localhost:8080/login) - 로그인 실패 테스트

Navigation Guards (내비게이션 가드)
(https://router.vuejs.kr/guide/advanced/navigation-guards.html)

Navigation Guards (내비게이션 가드)로 처리
1. src\router\index.js에서 로그인을 위한 내비게이션 가드를 추가합니다.
[라우트 전역 처리]
import { useLoginStore } from '@/stores/useLoginStore'

:

const router = createRouter({
  history: createWebHistory(process.env.BASE_URL),
  routes
})

router.beforeEach((to, from, next) => {
  const loginStore = useLoginStore();
  if (to.name.startsWith("lunchmenu")) {
    if (!loginStore.isLogin) {
      next({path: '/login', query: { returnUrl: to.fullPath }});
      //next('/login?returnUrl=' + to.fullPath);
    } else {
      next();
    }
  } else {
    next();
  }
});

export default router
export 전에 router.beforeEach를 추가합니다.
- to는 이동할 URL에 대한 객체
- form은 현재 URL에 대한 객체
- next는 이동하기 위한 메서드
이름이 "lunchmenu"로 시작하고 로그인이 되지 않은 상태일 때만 로그인이 적용되게 하합니다.
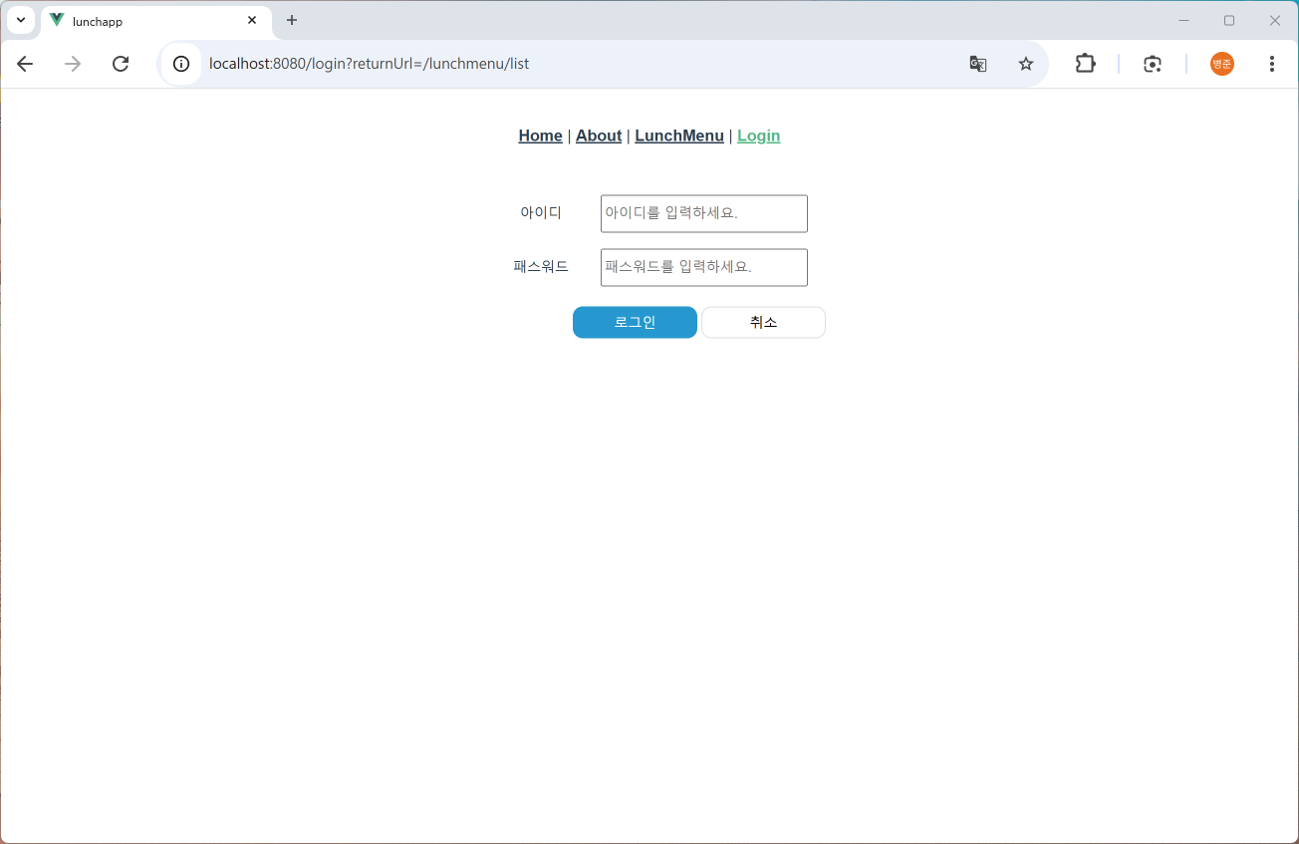
returnUrl로 이동할 URL의 경로를 전달합니다.
[라우트 별 처리]
import { useLoginStore } from '@/stores/useLoginStore'

:
const routes = [
  :
  {
    path: '/lunchmenu',
    component: LunchMenuView,
    beforeEnter : (to, from, next) => {
      const loginStore = useLoginStore();
      if (to.name.startsWith("lunchmenu")) {
        if (!loginStore.isLogin) {
          next({path: '/login', query: { returnUrl: to.fullPath }});
        } else {
          next();
        }
      } else {
        next();
      }
    },
    children : [
      :
    ]
]
:
[메서드를 생성하고 라우트 별 처리]
import { useLoginStore } from '@/stores/useLoginStore'

:
const Authentication = () => (to, from, next) => {
  const loginStore = useLoginStore();
  if (to.name.startsWith("lunchmenu")) {
    if (!loginStore.isLogin) {
      next({path: '/login', query: { returnUrl: to.fullPath }});
    } else {
      next();
    }
  } else {
    next();
  }
};

const routes = [
  :
  {
    path: '/lunchmenu',
    component: LunchMenuView,
    beforeEnter: Authentication(),
    children : [
      :
    ]
]
:
2. src\Account\LoginView.vue 파일을 수정합니다.
<script>
:
import { useRouter, useRoute } from 'vue-router';
:

export default {
    name : 'LoginView',
    setup() {
        const router = useRouter();
        const route = useRoute();

        function loginClick() {
            :

            const memberInfo = { id: state.memberId, password: state.memberPassword };
            loginStore.doLogin(memberInfo).then(() => {
                //router.replace({name : 'home'});
                const returnUrl = route.query.returnUrl;
                router.replace({path : returnUrl});
            }).catch((err) => {
                state.errorMessage = err.message;
            });
        }
        :
    }
};
</script>
3. 웹 브라우저에서 확인하기 (http://localhost:8080/lunchmenu/list → http://localhost:8080/login?returnUrl=/lunchmenu/list)
4. src\Account\LunchMenu\LunchMenuListView.vue 파일을 수정합니다.
<script>
:
import { useLoginStore } from '@/stores/useLoginStore';
:

export default {
    name : 'LunchMenuListView',
    setup() {
        :
        const loginStore = useLoginStore();

        function getLunchMenuList() {
            console.log(loginStore.idToken);
            axios.get("http://127.0.0.1:9000/api/v1/lunchmenus/", {
                headers: {
                    "Authorization" : "Bearer " + loginStore.idToken
                }
            }).then((res) => {
                console.log(res);
                lunchMenuList.value = res.data.data;
            }).catch((err) => {
                console.log(err);
            });
        }
        :
    }
};
</script>
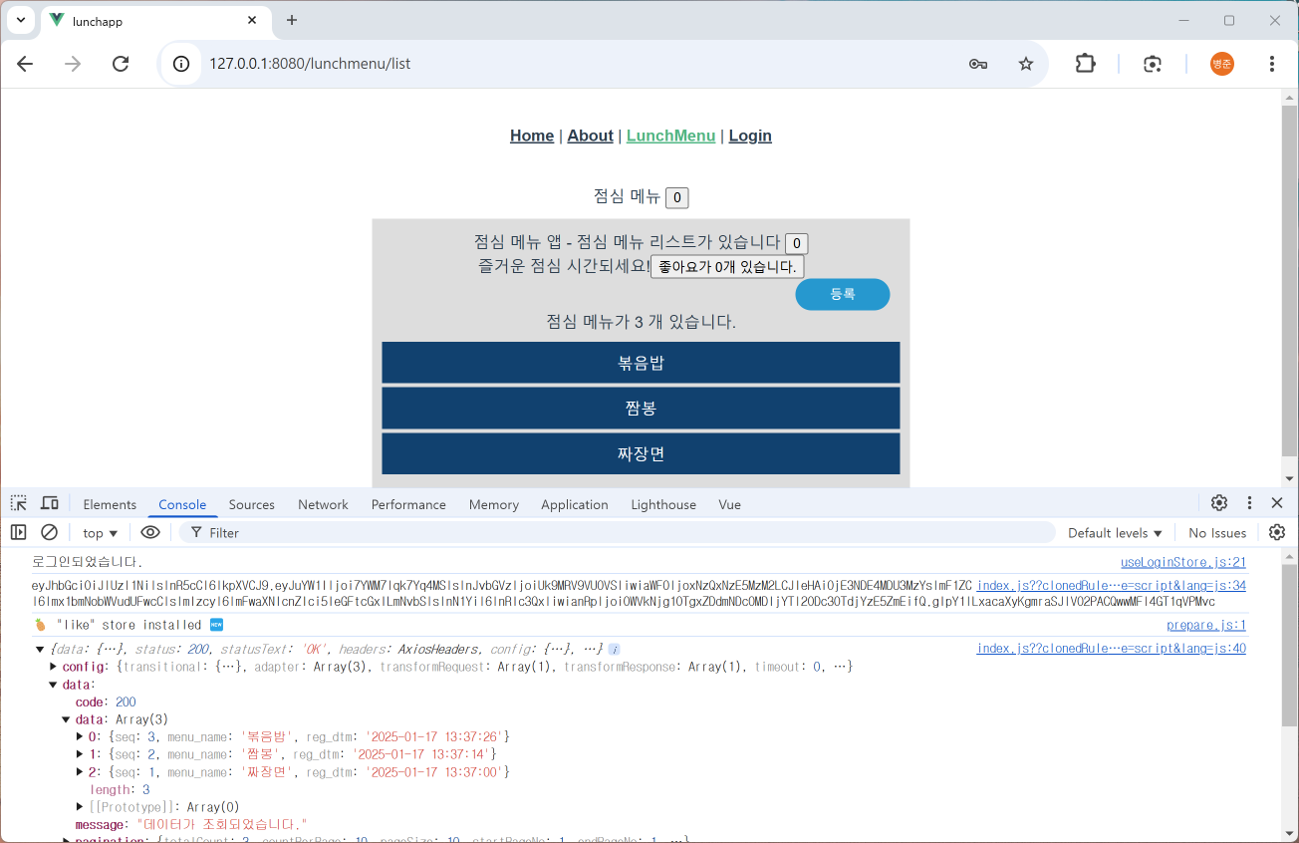
5. 웹 브라우저에서 확인하기 (http://localhost:8080/lunchmenu/list)
'Vue.js 3 & NodeJS > 사내교육 - 점심 메뉴' 카테고리의 다른 글
| [14] Backend 개발 - 사용자 API 개발, 라우트 별 인증 처리, 인가 처리 (0) | 2026.08.05 |
|---|---|
| [13] Backend 개발 - 사용자 API 개발, Access Token, Refresh Token (0) | 2026.08.05 |
| [11] Frontend 개발 - 상태 관리, Store – Pinia (0) | 2026.08.04 |
| [10] Frontend 개발 - 상태 관리 (0) | 2026.08.04 |
| [9] Backend 개발 - 사용자 API 개발, 인증 처리, ID Token (0) | 2026.08.04 |