등록 뷰 (AddView) 생성
1. src\views\LunchMenu에서 LunchMenuAddView.vue 파일을 생성합니다.

<template>
    <div>점심 메뉴 등록</div>
</template>

<script>
export default {
    setup() {
    }
}
</script>
2. src\router\index.js에서 LunchMenuAddView.vue를 import하고 routes에 route를 추가합니다.

:
import LunchMenuAddView from '@/views/LunchMenu/LunchMenuAddView.vue'

const routes = [
  :
  {
    path: '/lunchmenu/',
    name: 'lunchmenulist',
    component: LunchMenuListView
  },
  {
    path: '/lunchmenu/add',
    name: 'lunchmenuadd',
    component: LunchMenuAddView
  }
]
:
중첩된 라우트
/lunchmenu/와 /lunchmenu/add를 App.vue에 있는 router-view 컴포넌트가 아닌 /lunchmenu에서 Vue 컴포넌트를 생성하고 자체적인 router-view 컴포넌트에서 처리할 수 있습니다.
/ → app.vue
+- <router-view/>
+- /lunchmenu/ → LunchMenuListView.vue
+- /lunchmenu/add → LunchMenuAddView.vue

App.vue에 있는 router-view에서 변경됨
/ → app.vue
+- <router-view/>
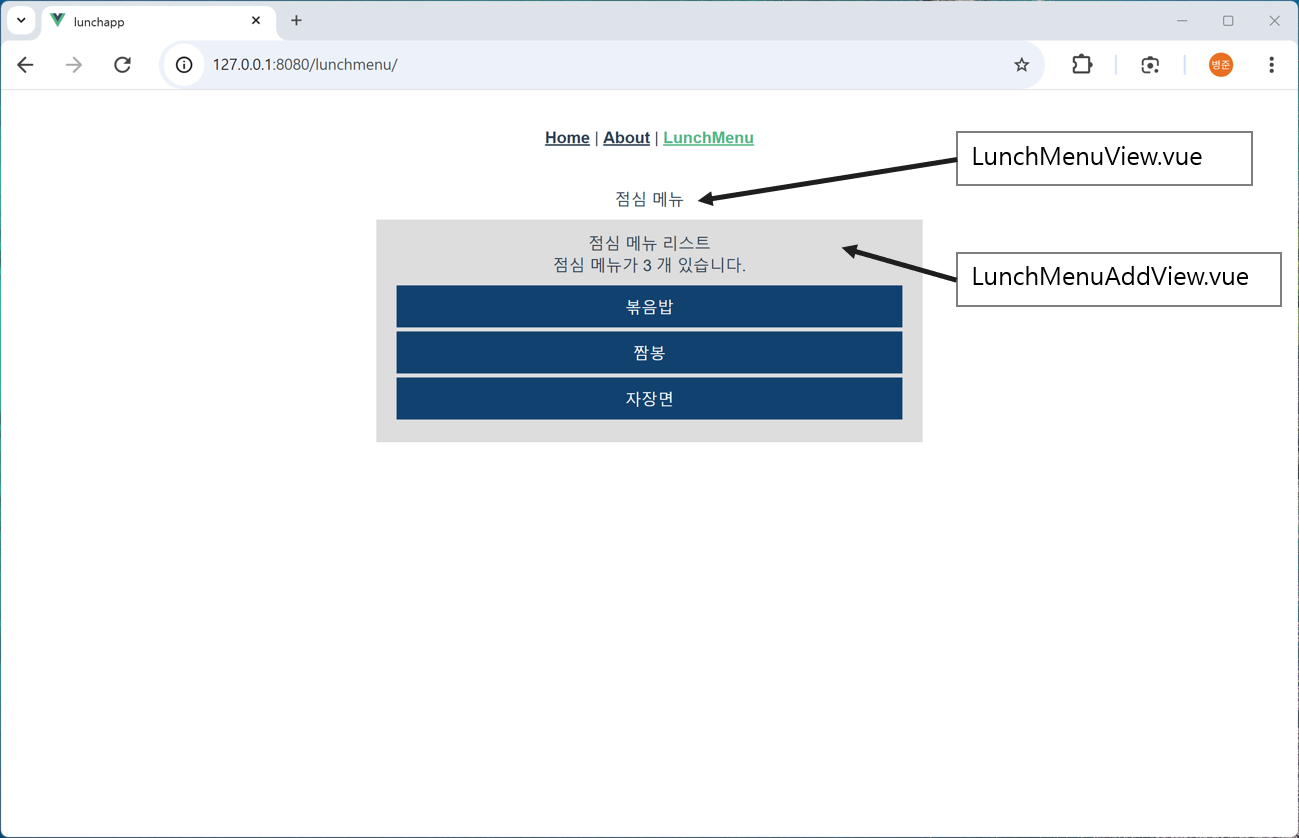
+- /lunchmenu → LunchMenuView.vue
+- <router-view/>
+- / → LunchMenuListView.vue
+- /add → LunchMenuAddView.vue

LunchMenuView에 있는 router-view에서 변경됨
중첩된 라우트에 연결된 Vue 컴포넌트에는 반드시 router-view 컴포넌트가 있어야 합니다.
App UI는 컴포넌트가 중첩되게 구성되어 있습니다.
웹 경로(URL)를 세그먼트(segment, 부분)하면 컴포넌트를 중첩 시킬 수 있습니다.

중첩된 라우트에 대한 설명을 참고하세요.
(https://router.vuejs.kr/guide/essentials/nested-routes.html)
3. src\views\LunchMenu에서 LunchMenuView.vue 파일을 생성합니다.
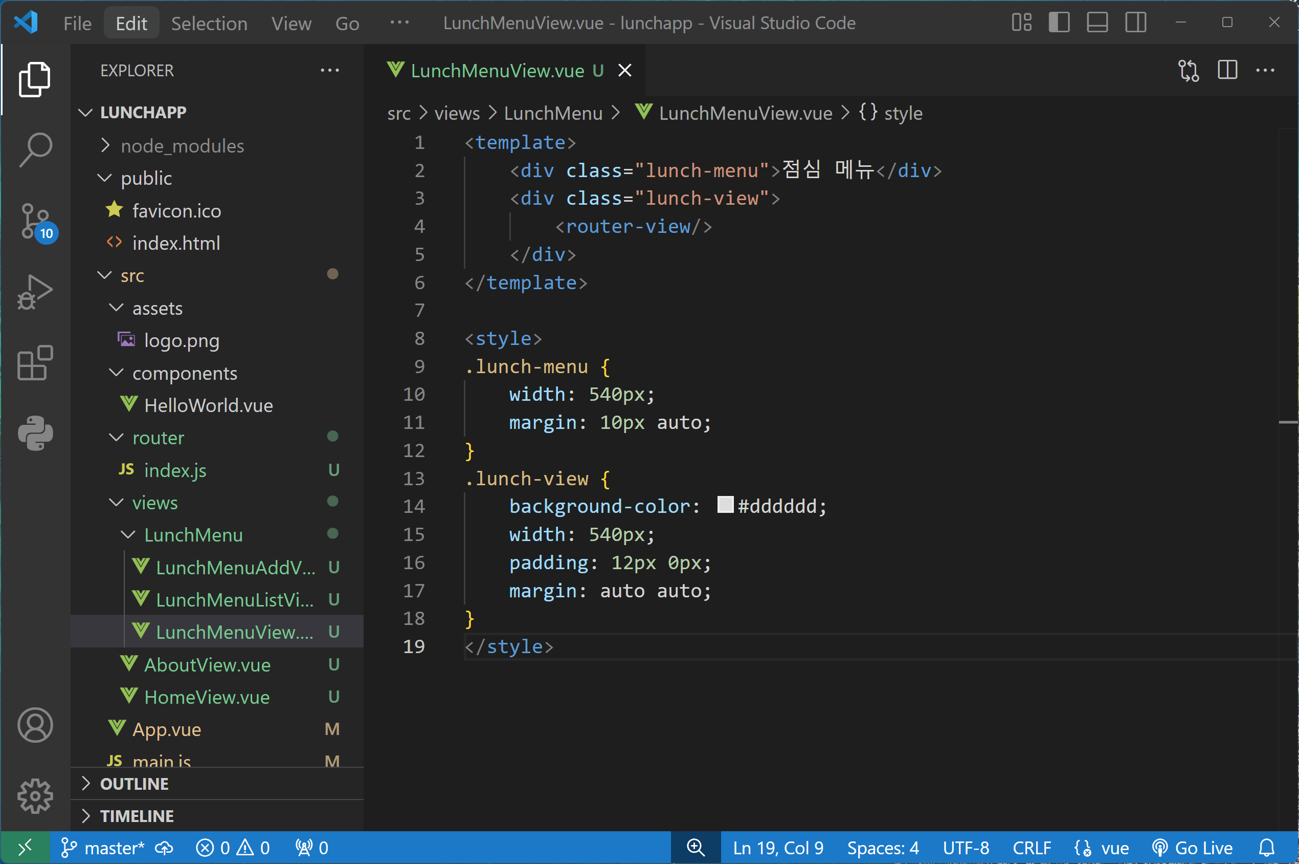
<template>
    <div class="lunch-menu">점심 메뉴</div>
    <div class="lunch-view">
        <router-view/>
    </div>
</template>

<style>
.lunch-menu {
    width: 540px;
    margin: 10px auto;
}
.lunch-view {
    background-color: #dddddd;
    width: 540px;
    padding: 12px 0px;
    margin: auto auto;
}
</style>
4. src\router\index.js에서 LunchMenuView.vue를 import하고 중첩된 웹 경로(부모 경로)를 분리하여 route에 추가하고 중첩되지 않는 웹 경로(자식 경로)는 children(칠드런)에 추가합니다.
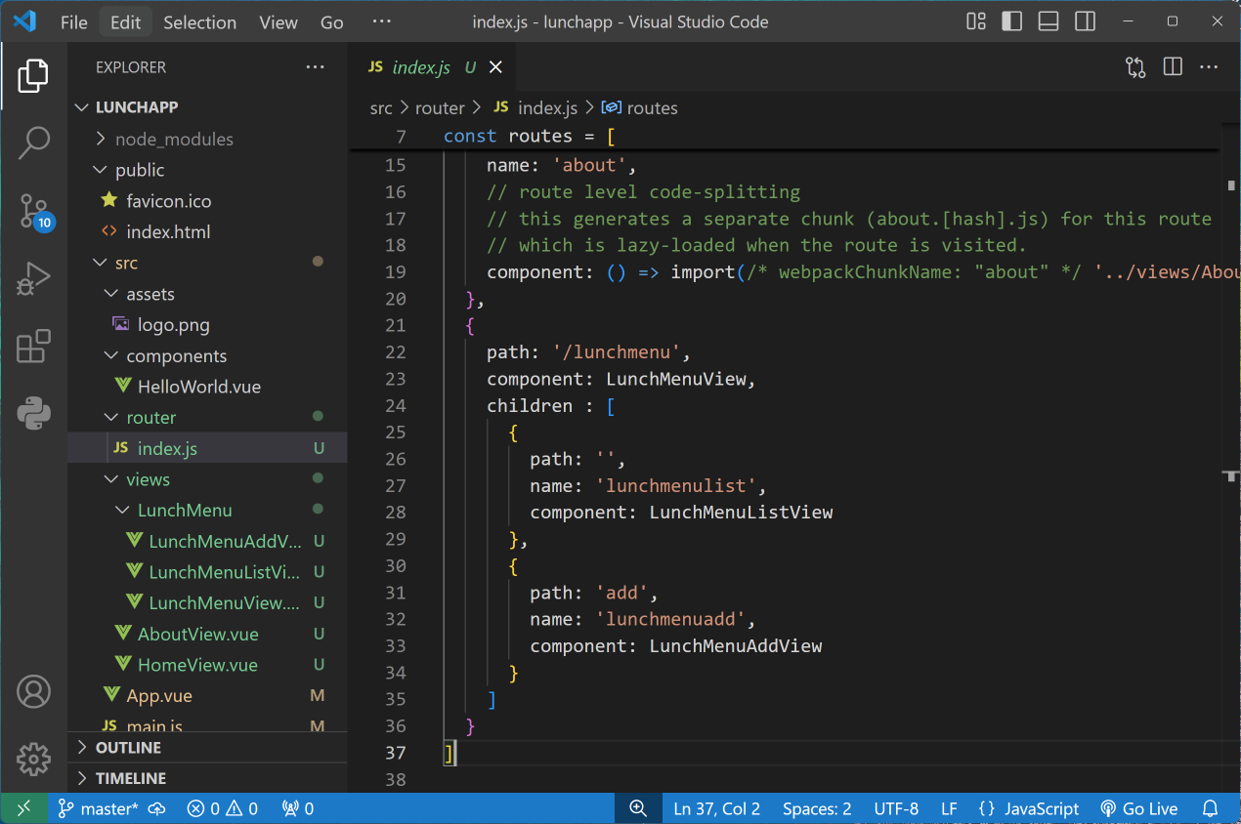
:
import LunchMenuView from '@/views/LunchMenu/LunchMenuView.vue'

const routes = [
  :
  {
    path: '/lunchmenu’,
    component: LunchMenuView,
    children : [
      {
        path: '',
        name: 'lunchmenulist',
        component: LunchMenuListView
      },
      {
        path: 'add',
        name: 'lunchmenuadd',
        component: LunchMenuAddView
      }
    ]
  }
]
:
5. 웹 브라우저에서 확인하기 (http://127.0.0.1:8080/lunchmenu/)
6. src\views\LunchMenu\LunchMenuListView.vue 파일에 등록 뷰 컴포넌트로 이동하기 위해 router-link를 추가합니다. <style>에 있는 menu-list를 수정합니다.
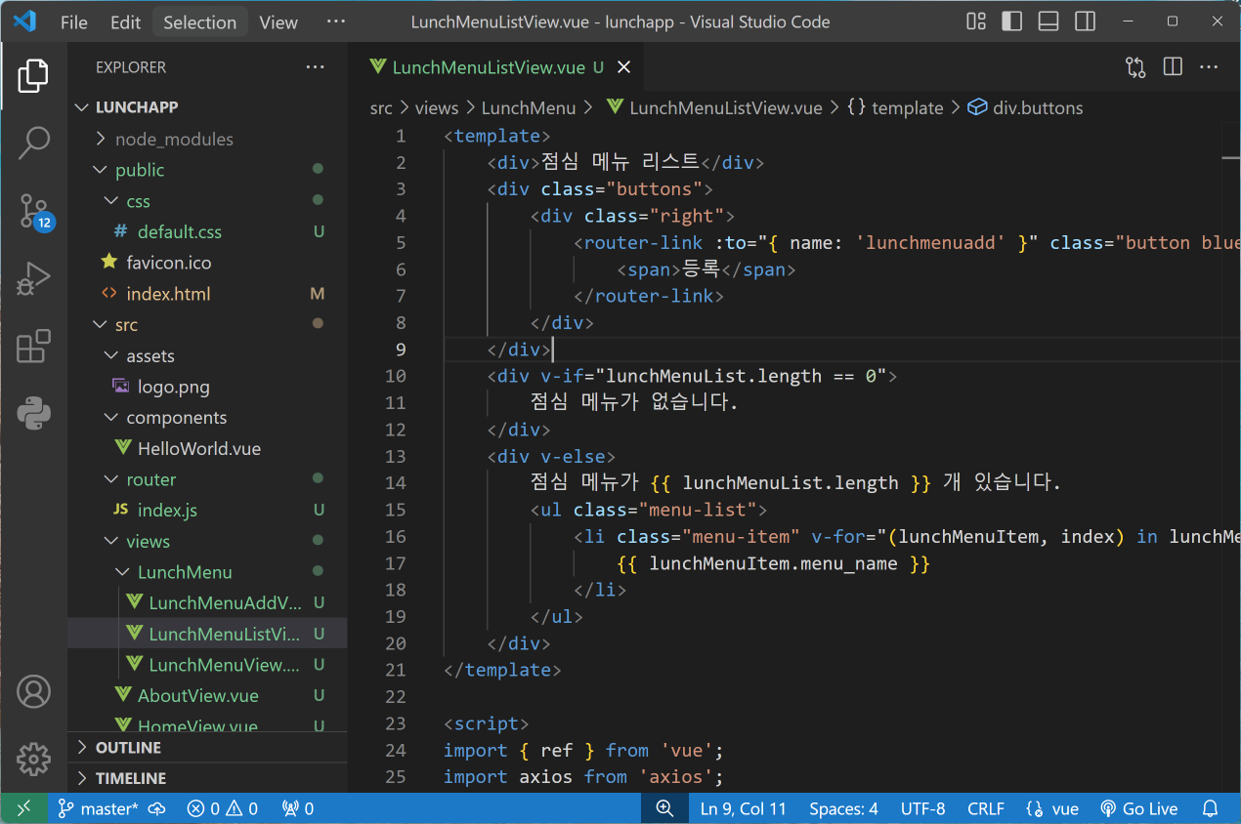
<template>
    <div>점심 메뉴 리스트</div>
    <div class="buttons">
        <div class="right">
            <router-link :to="{ name: 'lunchmenuadd' }" class="button blue">
                <span>등록</span>
            </router-link>
        </div>
    </div>
    :
</template>

<style>
.menu-list {
    margin: 10px 10px;
    padding: 0;
}
:
</style>- to 속성에 path(웹 경로) 대신 route(라우트) 이름을 사용하기 위해서는 :to 속성을 사용해야 합니다.
- :to는 v-bind:to를 단축한 겁니다. v-bind는 속성 값에 데이터를 바인딩해줍니다.
- name에는 route(라우트)를 생성할 때 부여한 이름을 사용합니다.
- /lunchmenu/add로 링크가 생성됩니다.
네임드 라우트
router-link 컴포넌트는 path 대신 route(라우트)를 생성할 때 부여한 이름으로 사용할 수 있습니다.
네임드 라우트 (https://router.vuejs.kr/guide/essentials/named-routes.html)
to 속성에 path(웹 경로)를 사용 → route(라우트)를 생성할 때 등록한 path를 사용
v3.x
<router-link to="/lunchmenu/add">등록</router-link>
<router-link :to="{ path: '/lunchmenu/add' }">등록</RouterLink>
v4.x
<RouterLink to="/lunchmenu/add">등록</RouterLink>
<RouterLink :to="{ path: '/lunchmenu/add' }">등록</RouterLink>
:to(v-bind:to) 속성에 name(이름)을 사용 → route(라우트)를 생성할 때 부여한 이름을 사용
v3.x
<router-link :to="{ name: 'lunchmenuadd' }">등록</router-link>
v4.x
<RouterLink :to="{ name: 'lunchmenuadd' }">등록</RouterLink>
7. public에 css 디렉터리를 생성하고 default.css 파일을 생성합니다. 공통으로 사용할 버튼 CSS를 추가합니다.
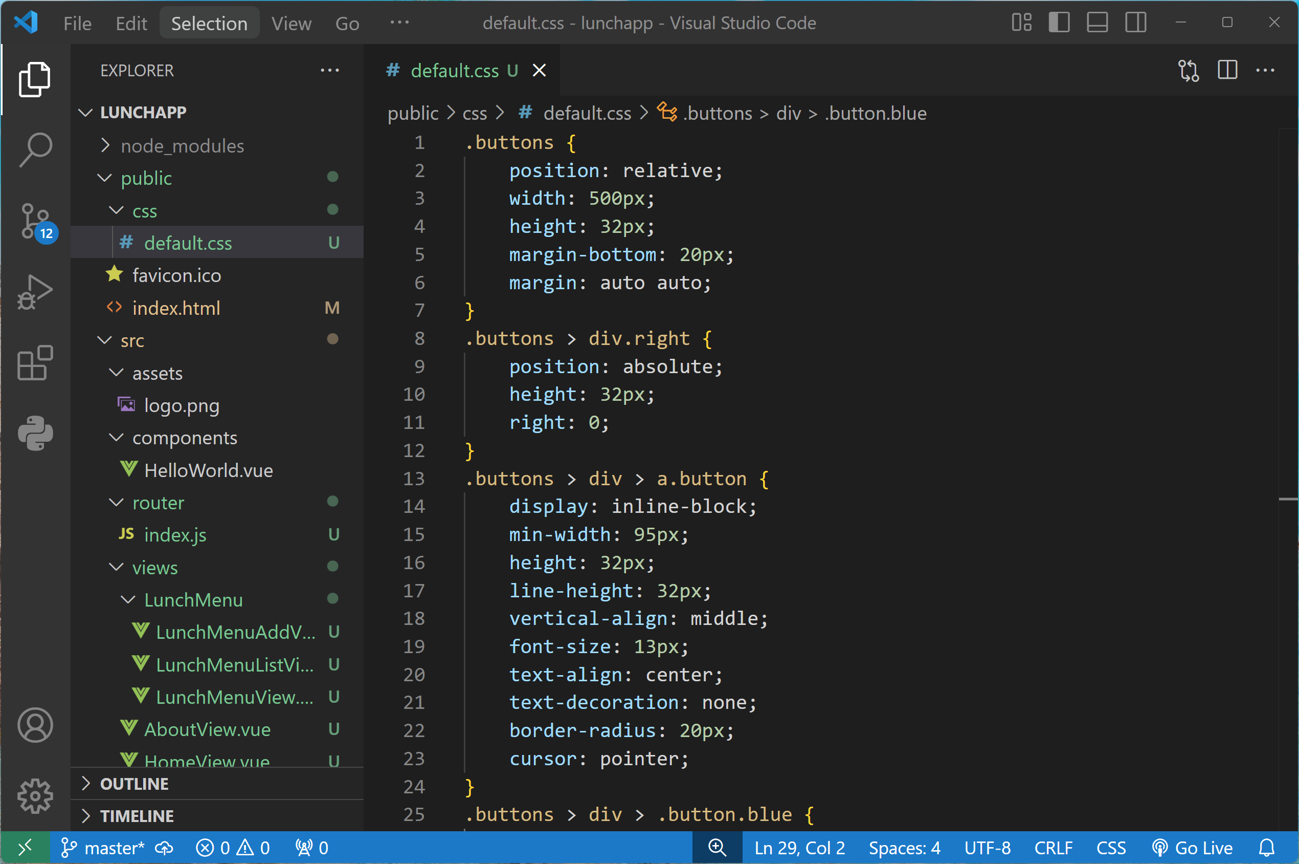
.buttons {
    position: relative;
    width: 500px;
    height: 32px;
    margin-bottom: 20px;
    margin: auto auto;
}
.buttons > div.right {
    position: absolute;
    height: 32px;
    right: 0;
}
.buttons > div > a.button {
    display: inline-block;
    min-width: 95px;
    height: 32px;
    line-height: 32px;
    vertical-align: middle;
    font-size: 13px;
    text-align: center;
    text-decoration: none;
    border-radius: 20px;
    cursor: pointer;
}
.buttons > div > .button.blue {
    color: #fff;
    border-color: #0099d2 !important;
    background: #0099d2 !important;
}
8. link로 스타일시트를 추가합니다.
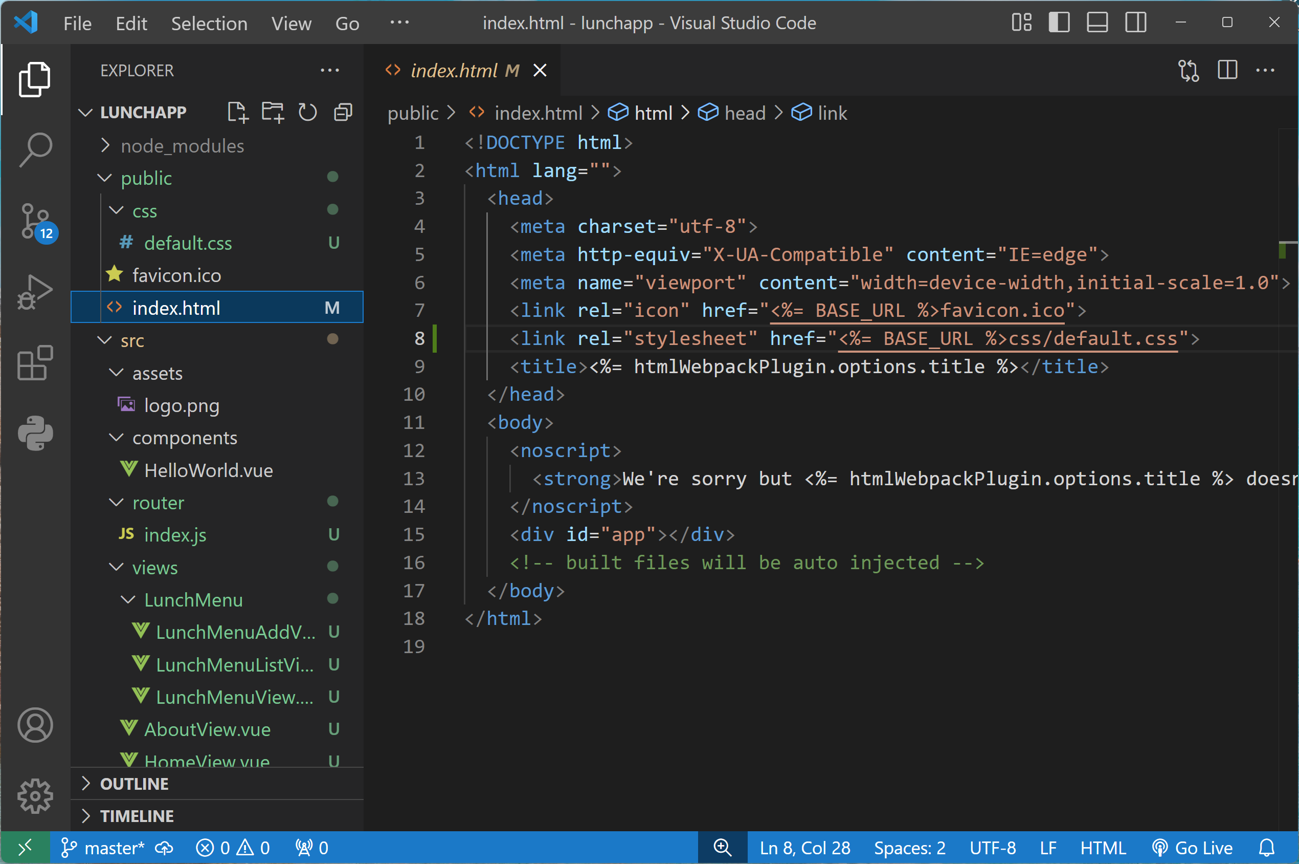
<!DOCTYPE html>
<html lang="">
  <head>
    <meta charset="utf-8">
    <meta http-equiv="X-UA-Compatible" content="IE=edge">
    <meta name="viewport" content="width=device-width,initial-scale=1.0">
    <link rel="icon" href="<%= BASE_URL %>favicon.ico">
    <link rel="stylesheet" href="<%= BASE_URL %>css/default.css">
    <title><%= htmlWebpackPlugin.options.title %></title>
  </head>
  <body>
    <noscript>
      <strong>We're sorry but <%= htmlWebpackPlugin.options.title %> doesn't work properly without JavaScript enabled. Please enable it to continue.</strong>
    </noscript>
    <div id="app"></div>
    <!-- built files will be auto injected -->
  </body>
</html>
<%= BASE_URL %> 대신 /를 사용해도 됩니다. → <link rel="stylesheet" href="/css/default.css">
vue.config.js에서 module.exports에 publicPath가 없으면 <%= BASE_URL %>은 /입니다.
BASE_URL 변경 방법
vue.config.js에서 module.exports에 publicPath로 경로를 추가하고 다시 시작(npm run serve)하면 BASE_URL이 publicPath로 변경됩니다.
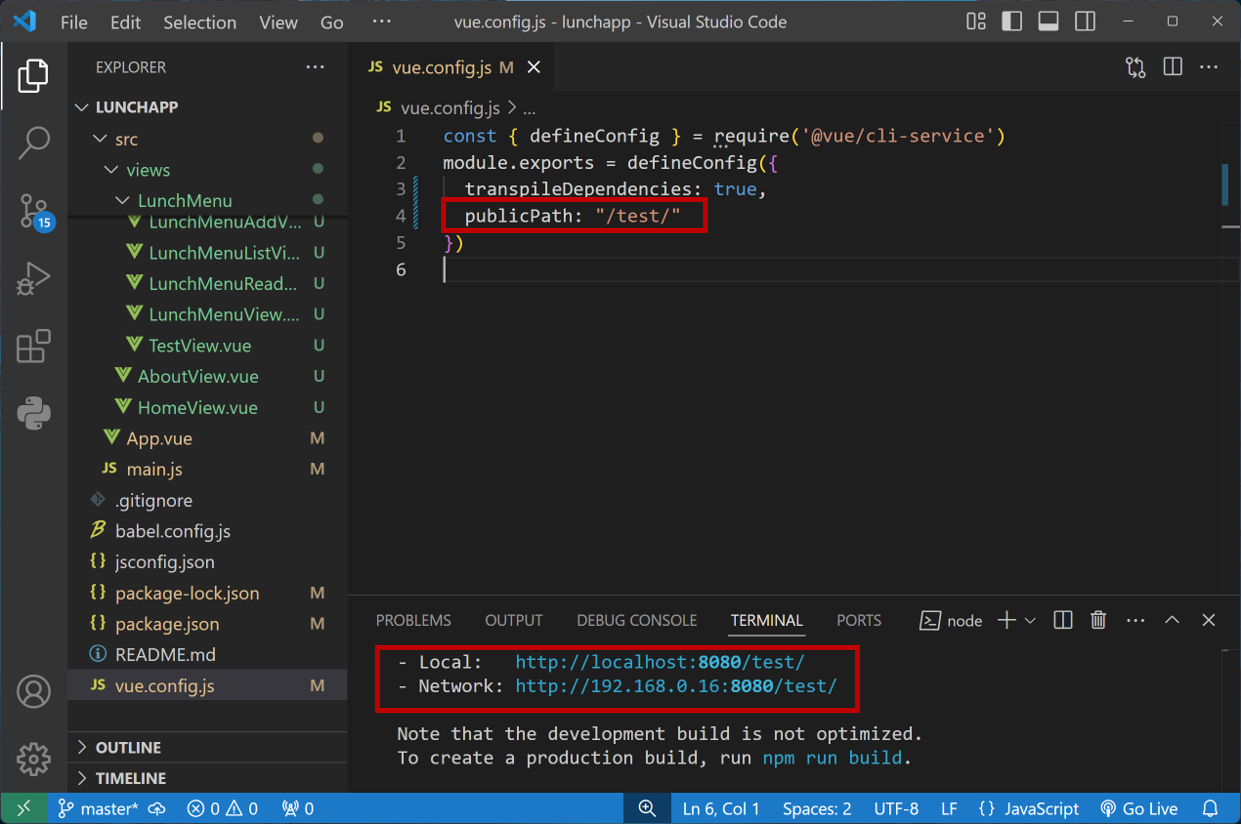
9. 웹 브라우저에서 확인하기 (http://127.0.0.1:8080/lunchmenu/)
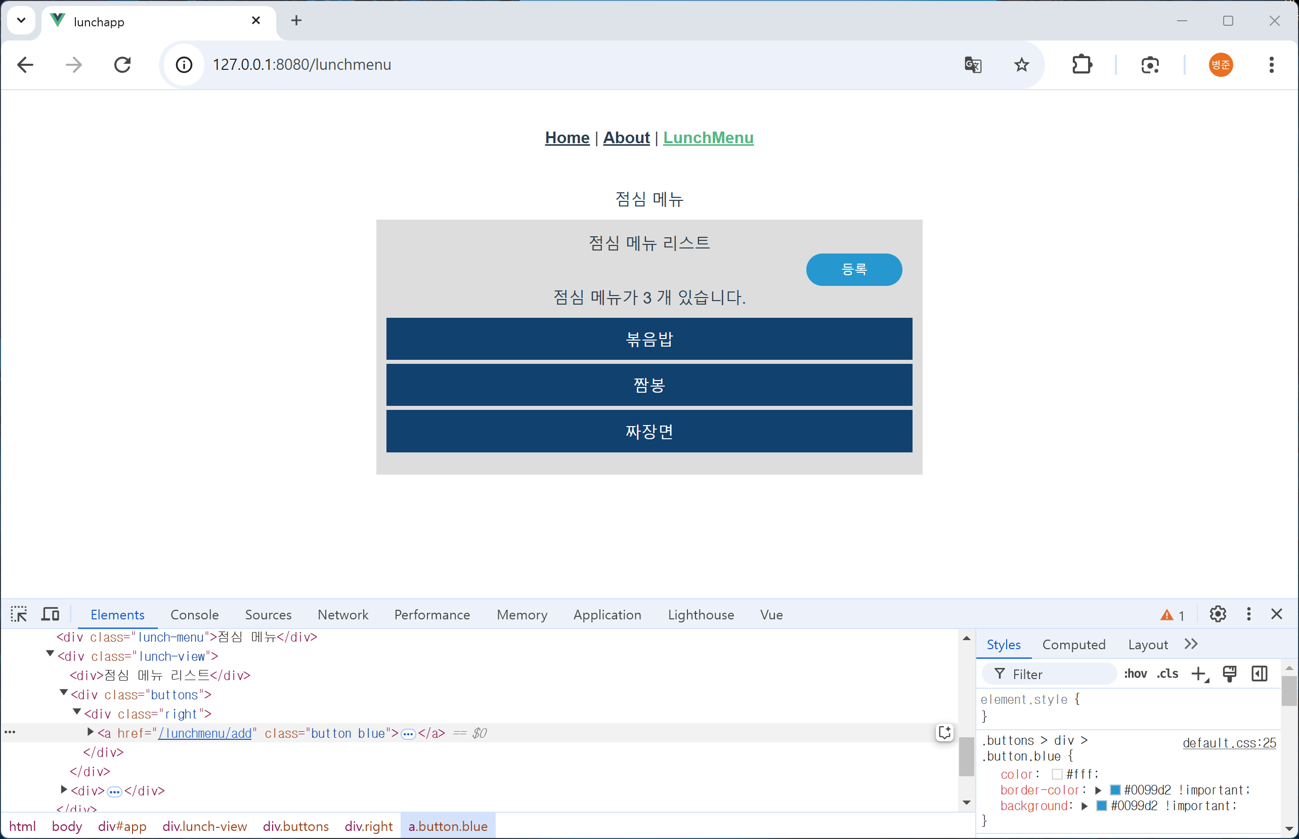
10. 웹 브라우저에서 확인하기 (http://127.0.0.1:8080/lunchmenu/add)

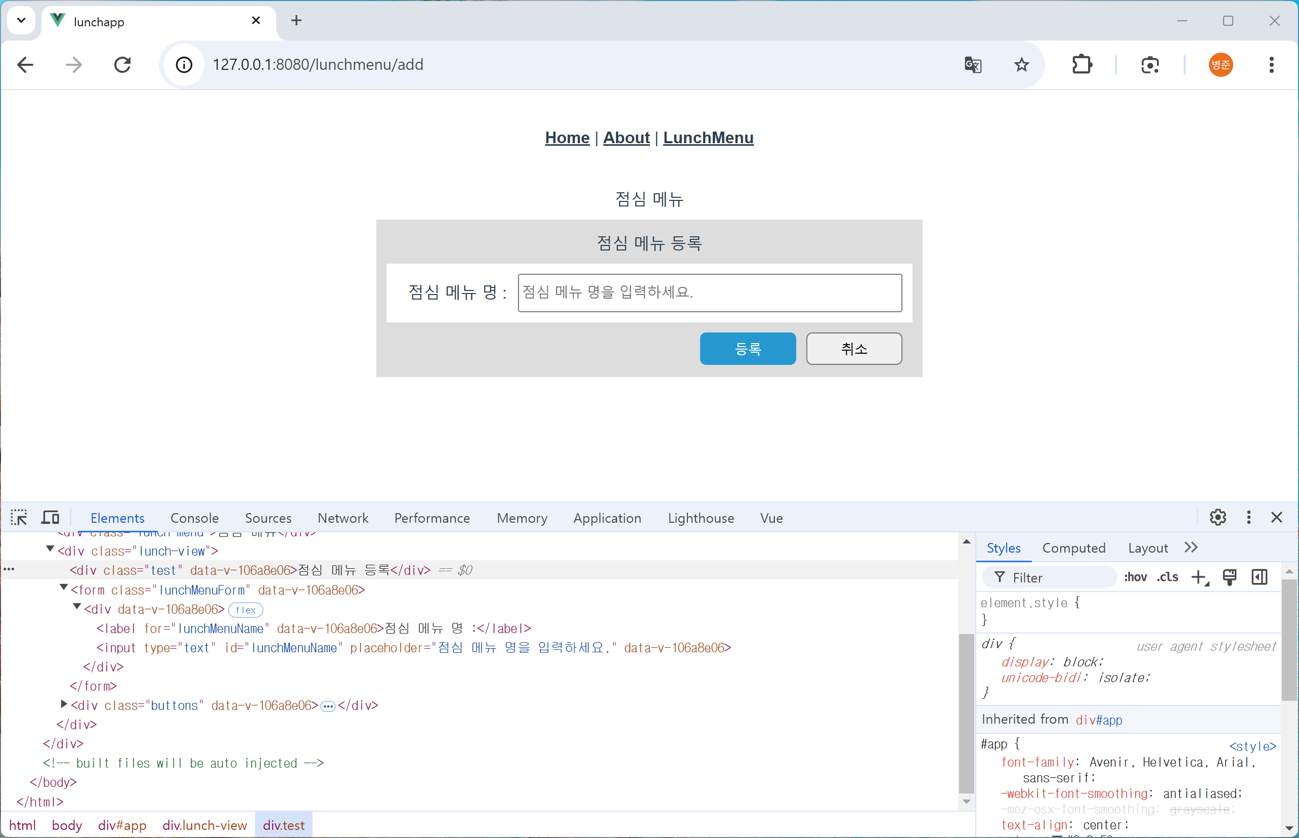
11. <template>에 점심 메뉴 입력 폼을 추가하고 이 컴포넌트에서만 사용하는 CSS를 <style>에 추가합니다.

<template>
    <div class="test">점심 메뉴 등록</div>
    <form class="lunchMenuForm">
        <div>
            <label for="lunchMenuName">점심 메뉴 명 :</label>
            <input type="text" id="lunchMenuName"
                placeholder="점심 메뉴 명을 입력하세요."/>
        </div>
    </form>
    <div class="buttons">
        <div class="right">
            <button class="button blue">등록</button>
            <button class="button">취소</button>
        </div>
    </div>
</template>

<script>
export default {
    setup() {
    }
}
</script>

<style scoped>
.lunchMenuForm {
    margin: 10px 10px; padding: 10px 10px 0px 10px; background-color: white;
}
.lunchMenuForm > div {
    padding-bottom: 10px; display: flex;
}
.lunchMenuForm label {
    flex: 0 0 120px; line-height: 38px;
}
.lunchMenuForm input[type="text"] {
    width: 100%; font-size: 14px;
}
button {
    display: inline-block; padding: 0.375rem 0.75rem; min-width: 95px;
    border: 1px solid #6c757d; border-radius: 0.375rem; margin-left: 10px;
    cursor: pointer;
}
button:first-child {
    margin-left: 0;
}
</style>
<style>에서 scoped를 설정하면 컴포넌트에서만 적용되는 스타일이 됩니다.
12. 웹 브라우저에서 확인하기 (http://127.0.0.1:8080/lunchmenu/add)
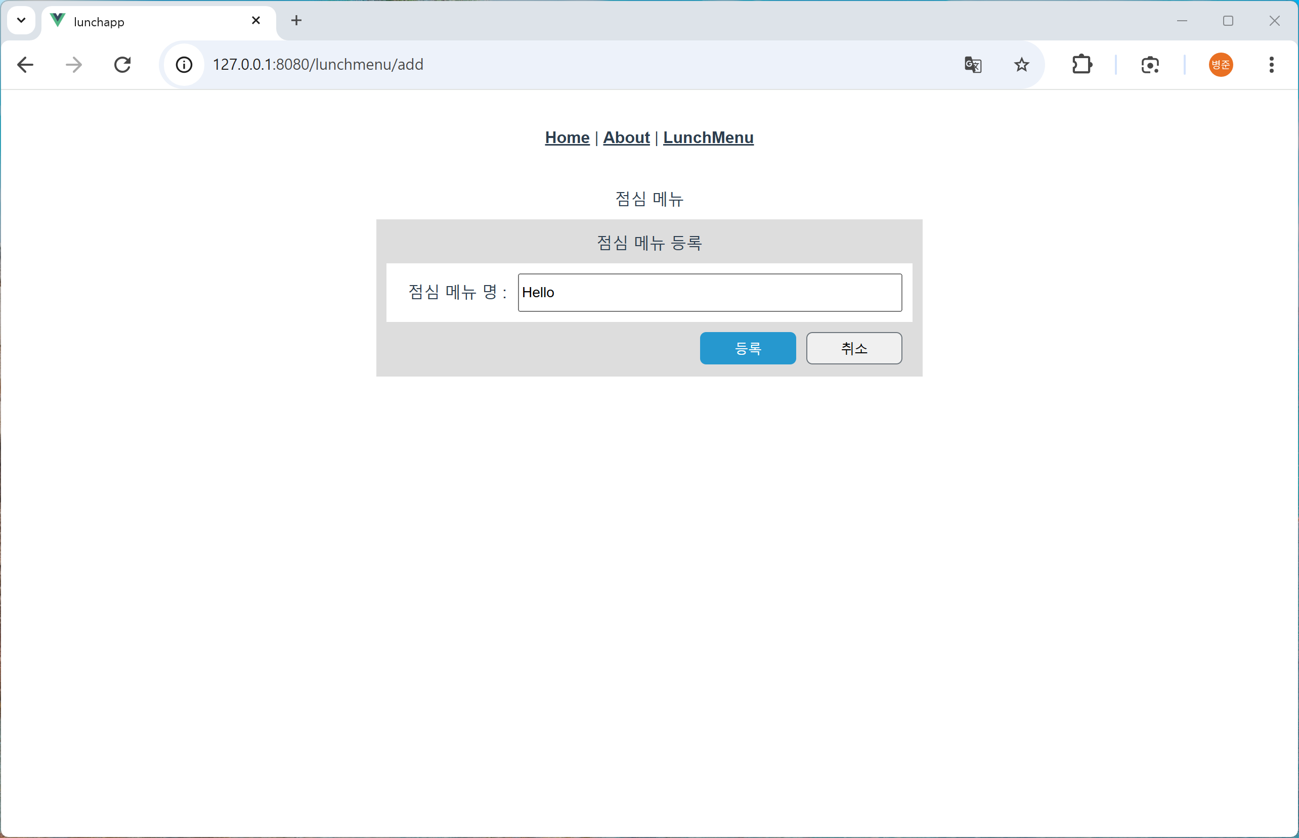
13. setup()에 점심 메뉴 명이 문자열로 저장될 lunchMenuName이 반응형이 되도록 reactive(리엑티브) 함수를 사용합니다. 그리고 <template>에서 사용할 수 있게 리턴합니다.
<script>
import { reactive } from 'vue';

export default {
    setup() {
        const state = reactive({
            lunchMenuName: ""
        });

        state.lunchMenuName = "Hello";

        return {
            state
        }
    }
}
</script>
값이 반응형 상태가 되도록 하는 ref(레프) 함수와 다르게 reactive(리엑티브) 함수는 객체 자체를 반응형으로 처리합니다. (https://ko.vuejs.org/guide/essentials/reactivity-fundamentals#reactive)
14. <template>에서 lunchMenuName과 <input> 태그가 양방향 바인딩되게 v-model 디렉티브를 사용합니다.
<template>
    <div class="test">점심 메뉴 등록</div>
    <form class="lunchMenuForm">
        <div>
            <label for="lunchMenuName">점심 메뉴 명 :</label>
            <input type="text" id="lunchMenuName"
                placeholder="점심 메뉴 명을 입력하세요."
                v-model="state.lunchMenuName"/>
        </div>
    </form>
    <div class="buttons">
        <div class="right">
            <button class="button blue">등록</button>
            <button class="button">취소</button>
        </div>
    </div>
</template>
Form 입력 바인딩에 대한 설명을 참고하세요.
(https://ko.vuejs.org/guide/essentials/forms.html#form-input-bindings)
15. 웹 브라우저에서 확인하기 (http://127.0.0.1:8080/lunchmenu/add)
toRef vs toRefs
반응형 객체인 state의 모든 속성에 대해 toRef()로 반환되게 하기 위해서는 toRefs() 함수를 사용합니다.
<script>
import { reactive, toRefs } from 'vue';

export default {
    setup() {
        const state = reactive({
            lunchMenuName: ""
        });

        state.lunchMenuName = "Hello";

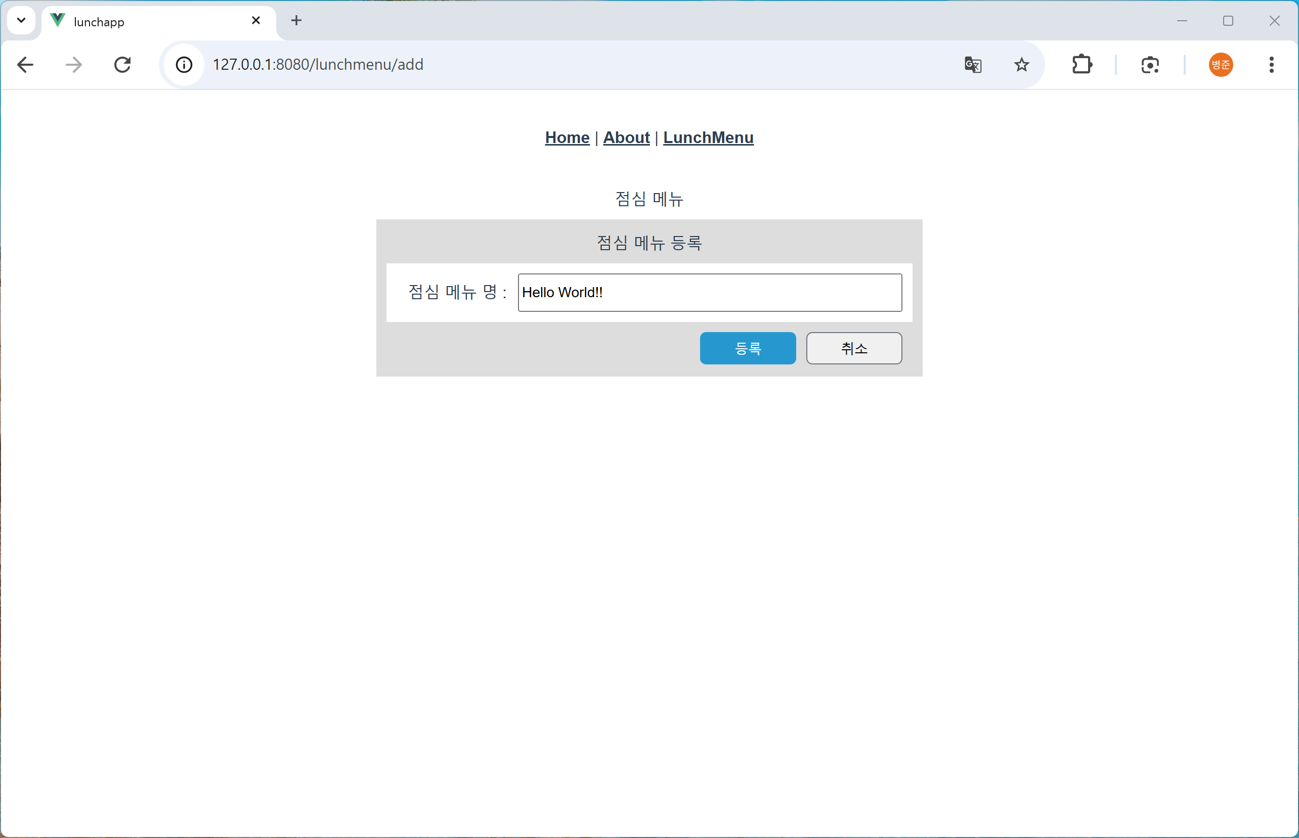
        const { lunchMenuName } = toRefs(state);
        lunchMenuName.value = "Hello World!!";

        return {
            lunchMenuName
        }
    }
}
</script>
toRefs()는 반응형 객체의 모든 속성에 대해 ref를 만들어 리턴합니다.
(https://ko.vuejs.org/api/reactivity-utilities.html#torefs)
모든 속성이 분해 할당됩니다. Destructuring(디스트럭처링, 구조 분해 할당)
const { lunchMenuName } = toRefs(state);
반응형 객체인 state의 모든 속성에 대해 toRef()로 반환되게 하기 위해서는 toRefs() 함수를 사용합니다.
<script>
import { reactive, toRefs } from 'vue';

export default {
    setup() {
        const state = reactive({
            lunchMenuName: ""
        });

        state.lunchMenuName = "Hello World!!";

        return {
            ...toRefs(state)
        }
    }
}
</script>
Spread Operator(스프레드 오퍼레이터)를 사용하여 모든 속성을 분해합니다. → 모든 속성들이 ref()로 리턴
웹 브라우저에서 확인하기 (http://127.0.0.1:8080/lunchmenu/add)
16. 버튼이 클릭되면 함수(핸들러)가 호출되도록 @click(v-on:click)를 사용합니다.
<template>
    <div class="test">점심 메뉴 등록</div>
    <form class="lunchMenuForm">
        <div>
            <label for="lunchMenuName">점심 메뉴 명 :</label>
            <input type="text" id="lunchMenuName"
                placeholder="점심 메뉴 명을 입력하세요."
                v-model="lunchMenuName"/>
        </div>
    </form>
    <div class="buttons">
        <div class="right">
            <button class="button blue" @click="addClick">등록</button>
            <button class="button" @click="cancelClick">취소</button>
        </div>
    </div>
</template>
@는 v-on 디렉티브를 단축한 겁니다.
@이벤트=함수(핸들러)
함수(핸들러)는 setup()에 함수로 정의합니다.
이벤트 핸들링에 대한 설명을 참고하세요.
(https://ko.vuejs.org/guide/essentials/event-handling.html)
v-on에 대한 설명을 참고하세요.
(https://ko.vuejs.org/api/built-in-directives#v-on)
17. setup()에 버튼 클릭에 대한 함수(핸들러)를 정의하고 리턴합니다.
<script>
import { reactive, toRefs } from 'vue';

export default {
    setup() {
        const state = reactive({
            lunchMenuName: ""
        });

        function addClick() {
        }

        function cancelClick() {
        }

        return {
            ...toRefs(state),
            addClick,
            cancelClick
        }
    }
}
</script>
18. 취소 버튼이 클릭되면 이전 경로로 이동하기 위해서 라우터 인스턴스를 받아서 이전 경로로 이동하도록 router.back() 또는 router.go() 함수를 사용합니다. → Router 프로그램 방식
<script>
import { reactive, toRefs } from 'vue';
import { useRouter } from 'vue-router';

export default {
    setup() {
        const router = useRouter();
        :
        function cancelClick() {
            router.back();
        }
        :
    }
}
</script>
router.back();은 router.go(-1);과 같습니다.
특정 히스토리로 이동합니다.
(https://router.vuejs.kr/guide/essentials/navigation.html#Traverse-history)
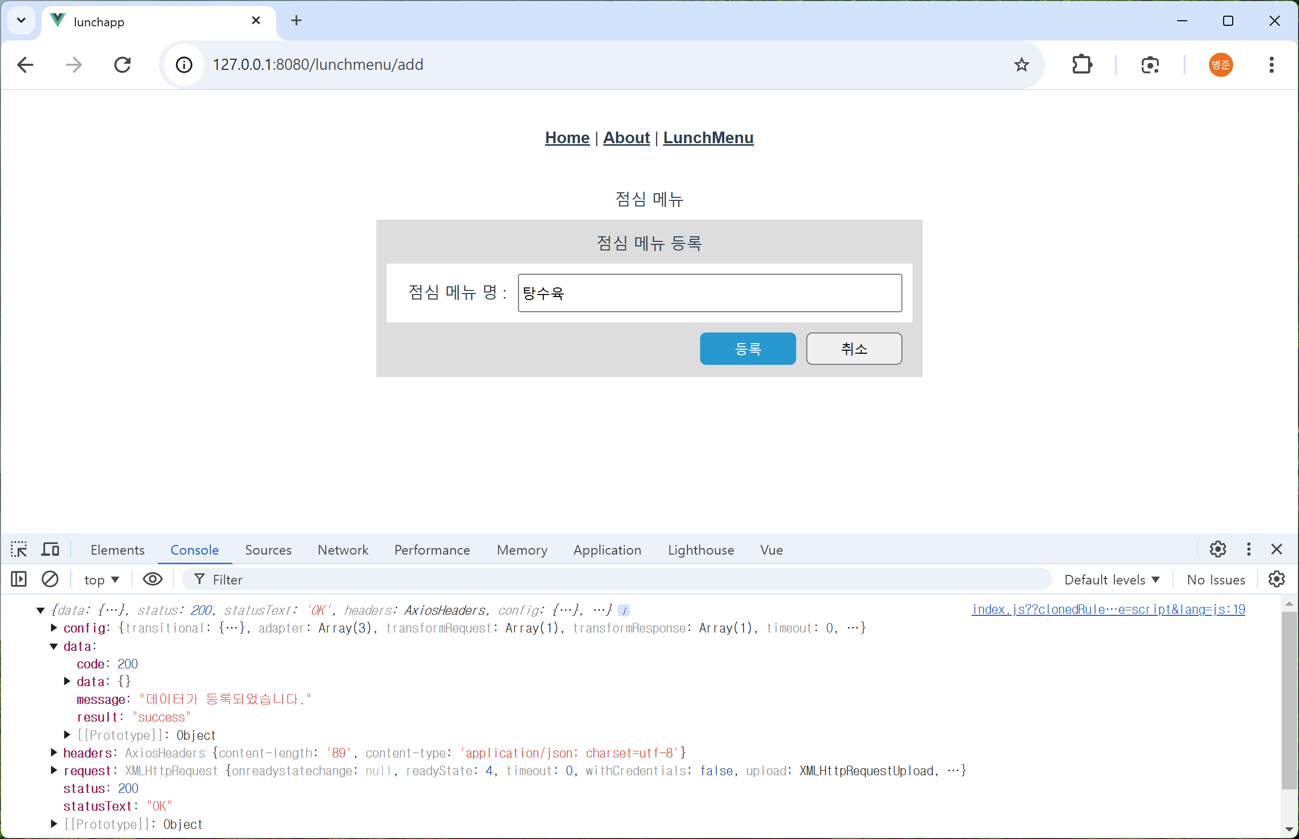
19. 등록 버튼이 클릭되면 axios(엑시오스)의 post() 함수를 사용하여 APIServer에 점심 메뉴가 추가 되도록 합니다.
<script>
:
import axios from 'axios';

export default {
    setup() {
        :
        const state = reactive({
            lunchMenuName: ""
        });

        function addClick() {
            const lunchMenuItem = { menuName : state.lunchMenuName };
            axios.post("http://127.0.0.1:9000/api/v1/lunchmenus/", lunchMenuItem).then((res) => {
                console.log(res);
            }).catch((err) => {
                console.log(err);
            });
        }
        :
    }
}
</script>
20. 웹 브라우저에서 확인하기 (http://127.0.0.1:8080/lunchmenu/add)
21. 점심 메뉴가 추가되면 점심 메뉴 리스트로 이동되도록 router.replace() 함수를 사용합니다.
<script>
:

export default {
    setup() {
        const router = useRouter();

        const state = reactive({
            lunchMenuName: ""
        });

        function addClick() {
            const lunchMenuItem = { menuName : state.lunchMenuName };
            axios.post("http://127.0.0.1:9000/api/v1/lunchmenus/", lunchMenuItem).then(() => {
                router.replace({name : 'lunchmenulist'});
            }).catch((err) => {
                console.log(err);
            });
        }
        :
    }
}
</script>
라우터 이동
router.push() 함수와 router.replace() 함수는 이동할 위치 정보를 이용하여 vue 컴포넌트로 이동합니다.
- router.push() (https://router.vuejs.kr/api/interfaces/Router.html#push)
- router.replace() (https://router.vuejs.kr/api/interfaces/Router.html#replace)
router.push() 함수를 사용하면 히스토리에 추가됩니다. 웹 브라우저에서 이전 버튼을 클릭하면 현재 링크(등록 뷰 컴포넌트)로 이동합니다.
router.push({name : 'lunchmenulist'});router.replace() 함수를 사용하면 현재 히스토리가 변경됩니다. 웹 브라우저에서 이전 버튼을 클릭하면 현재 링크(등록 뷰 컴포넌트)의 이전 링크(리스트 뷰 컴포넌트)로 이동합니다.
router.replace({name : 'lunchmenulist'});
21. 웹 브라우저에서 확인하기 (http://127.0.0.1:8080/lunchmenu)

'Vue.js 3 & NodeJS > 사내교육 - 점심 메뉴' 카테고리의 다른 글
| [8] Backend 개발 - 사용자 API 개발, 인증 처리, Session + HTTP Cookie (0) | 2026.08.04 |
|---|---|
| [7] Frontend 개발 - 읽기 뷰 (ReadView), 수정, 삭제 생성 (0) | 2026.08.03 |
| [5] Backend 개발 - API Server 개발, Node.JS + Search (0) | 2026.08.03 |
| [4] Backend 개발 - API Server 개발, Node.JS + Paging (0) | 2026.08.03 |
| [3] Backend 개발 - API Server 개발, Node.JS + MyBatis3 (0) | 2026.08.03 |