Singleton(싱글톤)이란, JVM(Java Virtual Machine - 자바 가상 머신) 내에서 클래스를 한 개의 instance(인스턴스)으로 생성하여 사용하는 것입니다.
1. "test2" 프로젝트의 "Java Resources"에서 "src/main/java"의 "com.hom.project.test2.service"에서 오른쪽 버튼을 클릭하여 컨텍스트 메뉴 [New > Class]를 클릭합니다.
"New Java Class"창의 "Name"에 "TestSingleton"를 입력하고 "Modifiers"의 "final"를 체크하고 "Finish"버튼을 클릭합니다.
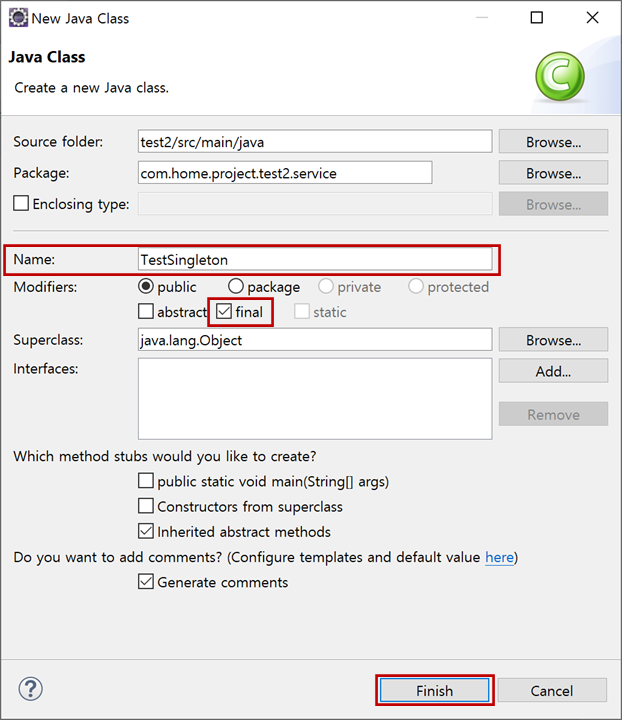
"test2" 프로젝트의 "Java Resources"에서 "src/main/java"의 "com.hom.project.test2.service"에 "TestSingleton.java"파일이 생성됩니다.
싱글톤의 클래스 구조는 다음과 같습니다.
- constructor(생성자)는 "private"로 지정합니다. "new"로 생성할 수 없게 합니다.
private TestSingleton() {
}
- 인스턴스를 저장하는 정적(static) 변수를 선언합니다.
private static TestSingleton testSingletonInstance = null;- 한 개의 인스턴스를 생성하기 위해 정적(static) 메서드를 생성합니다.
public static TestSingleton getInstance() {
	if (null == testSingletonInstance) {
		testSingletonInstance = new TestSingleton();
	}
	return testSingletonInstance;
}
이클립스(Eclipse)에서 "Getter"와 "Setter"를 간편하데 생성하는 방법을 설명하겠습니다.
마우스를 문제(Java Probleam)가 발생한 "name" 위로 이동합니다. 그러면 툴팁이 나타납니다.
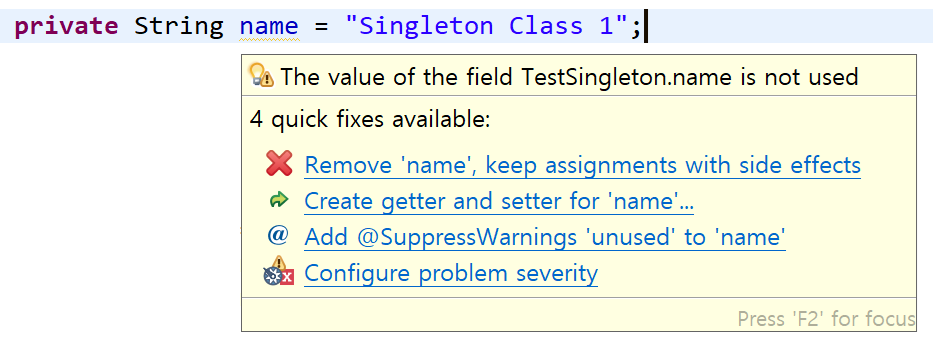
"The value of the field TestSingleton.name is not used"는 "TestSingleton에 선언된 name 필드를 사용하지 않았다"라고 문제(Java Probleam)가 나타납니다. 오류는 아니고 단순한 경고입니다. 클래스에서 name 필드(변수)를 사용하면 없어집니다.
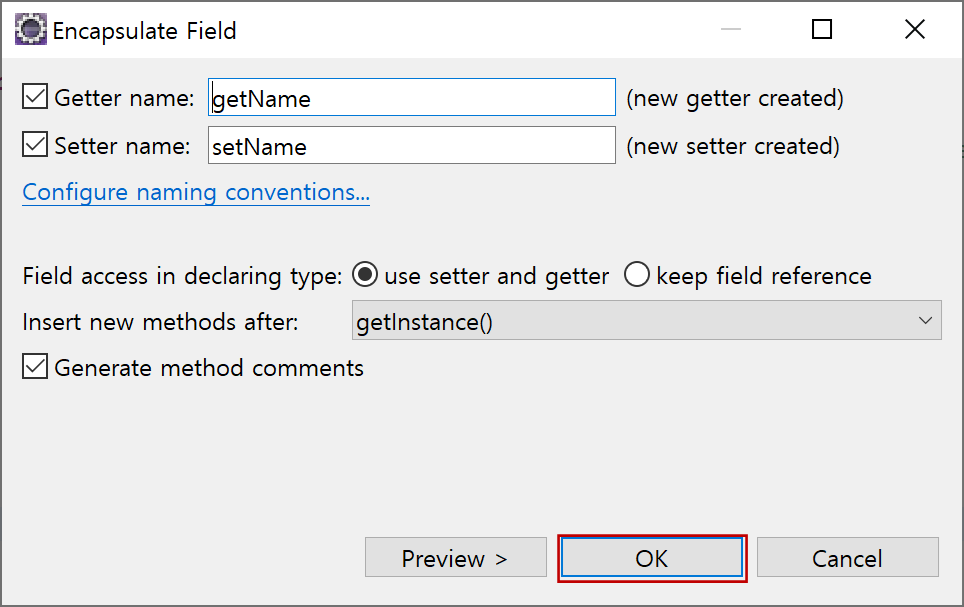
여기서는 "name"에 대한 "Getter"와 "Setter"를 만들기 위해 "Create getter and setter 'name'..."를 선택합니다. "OK"버튼을 클릭합니다. "Getter"와 "Setter"의 명을 변경해도 됩니다.
"Getter"와 "Setter"도 자동으로 만들어지고 필드(변수)도 사용하였기 때문에 문제(Java Probleam)도 없어집니다.
public String getName() {
	return name;
}

public void setName(String name) {
	this.name = name;
}"TestSingleton.java"의 전체 소스입니다.
private static TestSingleton testSingletonInstance = null;
private String name = "Singleton Class 1";

private TestSingleton() {
}

public static TestSingleton getInstance() {
	if (null == testSingletonInstance) {
		testSingletonInstance = new TestSingleton();
	}
	return testSingletonInstance;
}

public String getName() {
	return name;
}

public void setName(String name) {
	this.name = name;
}
[thread-safe]
multi-thread(멀티스레드)로 처리되는 프로그램에서 스레드 동기화 문제를 처리하기 위해 "Synchronized" 키워드를 사용하면 동시 접근 문제를 해결할 수 있습니다.
public synchronized static TestSingleton getInstance() {
	if(null == testSingletonInstance) {
		testSingletonInstance = new TestSingleton();
	}
	return testSingletonInstance;
}
하지만, "getInstance"를 호출할 때마다 동시 접근을 막기 위해 "lock/unlock"를 하게 됩니다.
그래서 클래스의 인스턴스를 생성(new)할 때 접근 제어를 하는 것이 좋습니다. "Double-Checked Locking(DCL)"이라 합니다. 또한, 변수를 메인 메모리에서만 참조하게 "volatile" 키워드를 사용합니다.
private volatile static TestSingleton testSingletonInstance = null;

public static TestSingleton getInstance() {
	if (null == testSingletonInstance) {
		synchronized (TestSingleton.class) {
			if (null == testSingletonInstance) {
				testSingletonInstance = new TestSingleton();
			}
		}
	}
	return testSingletonInstance;
}
또는 정적(static) testSingletonInstance 변수 초기화 시점에 생성하여 사용합니다. 다만, 싱글톤 클래스를 사용하지 않는다면 메모리 낭비가 됩니다. 개인적으로 WAS 성능상 문제는 없어 보입니다.
private volatile static TestSingleton testSingletonInstance = new TestSingleton();

public static TestSingleton getInstance() {
	return testSingletonInstance;
}
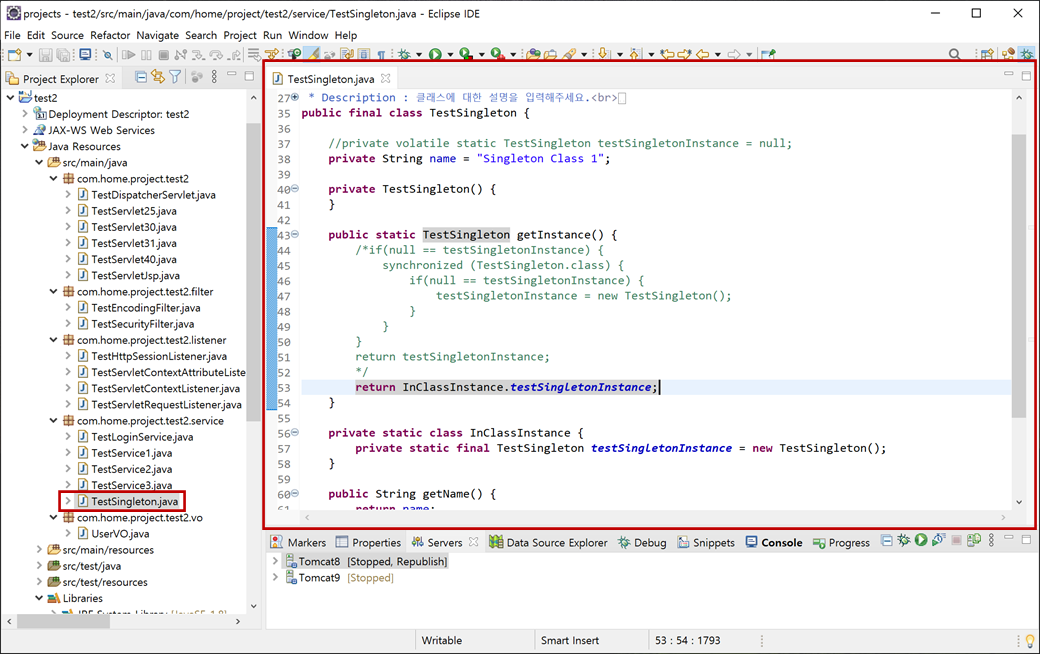
더 안정적이고 좋은 처리 방법으로는 내부 클래스를 이용하여 객체 생성을 하는 "LazyHolder"방식이 있습니다.
"InClassInstance"클래스에는 다른 변수들이 없어 초기화 없이 바로 생성할 수 있어 가장 좋은 방법입니다.
public static TestSingleton getInstance() {
	return InClassInstance.testSingletonInstance;
}

private static class InClassInstance {
	private static final TestSingleton testSingletonInstance = new TestSingleton();
}
정적(static) testSingletonInstance 변수는 필요하지 않아 삭제합니다.
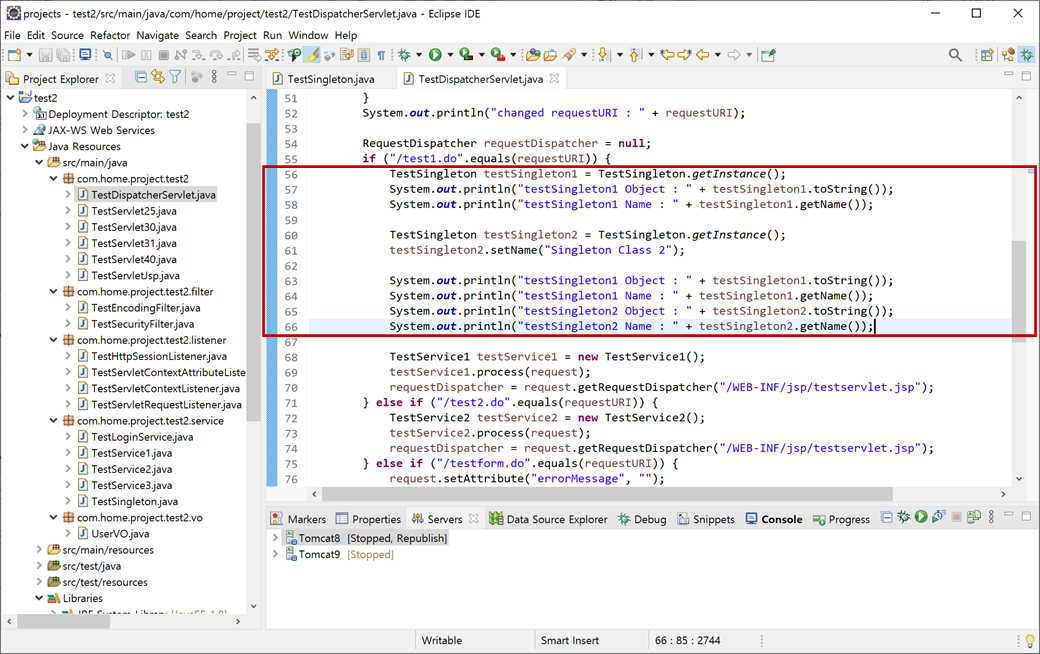
2. "TestDispatcherServlet.java"의 "service"메서드에 "test1.do"에 코딩을 추가하고 저장합니다.
if ("/test1.do".equals(requestURI)) {
	TestSingleton testSingleton1 = TestSingleton.getInstance();
	System.out.println("testSingleton1 Object : " + testSingleton1.toString());
	System.out.println("testSingleton1 Name : " + testSingleton1.getName());

	TestSingleton testSingleton2 = TestSingleton.getInstance();
	testSingleton2.setName("Singleton Class 2");

	System.out.println("testSingleton1 Object : " + testSingleton1.toString());
	System.out.println("testSingleton1 Name : " + testSingleton1.getName());
	System.out.println("testSingleton2 Object : " + testSingleton2.toString());
	System.out.println("testSingleton2 Name : " + testSingleton2.getName());

	TestService1 testService1 = new TestService1();
	testService1.process(request);
	requestDispatcher = request.getRequestDispatcher("/WEB-INF/jsp/testservlet.jsp");
}"TestSingleton"클래스가 "import"되어 있지 않아서 오류가 납니다. 마우스를 "TestSingleton"클래스 위로 이동하면 컨텍스트 메뉴가 나타납니다. 여기서 "import 'TestSingleton' (com.home.project.test2.service)"를 클릭하고 저장합니다.
3. "Servers"탭에서 "Tomcat8"를 선택하고 "start"버튼(start the server)을 클릭합니다. 웹 브라우저에서 "http://localhost:8080/test2/test1.do"를 입력합니다.

"Console"탭을 클릭합니다.
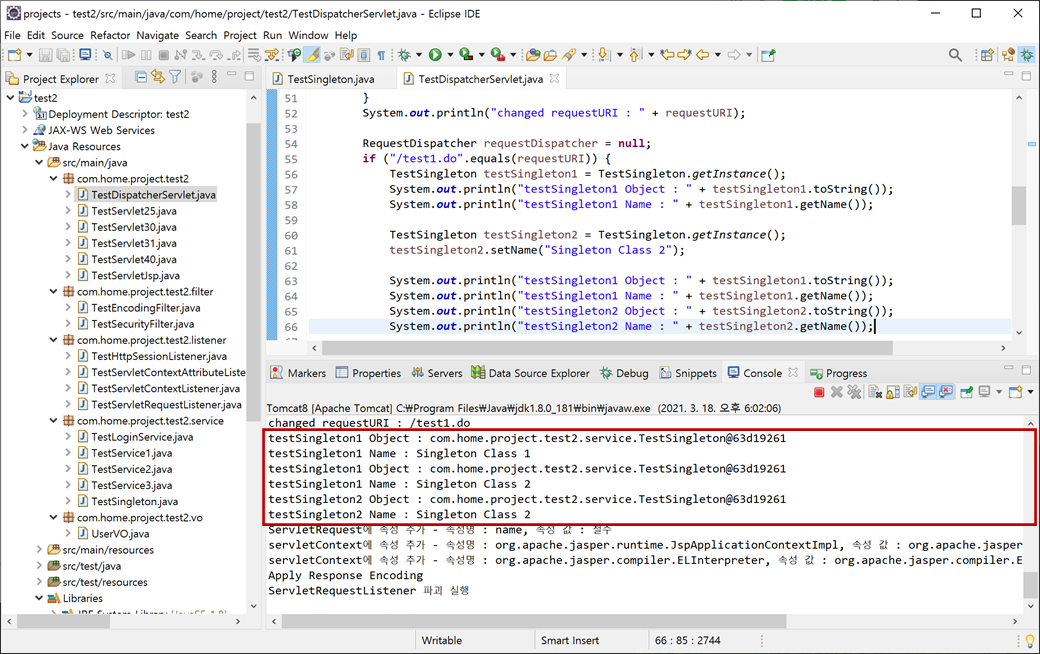
[Console]
testSingleton1 Object : com.home.project.test2.service.TestSingleton@63d19261
testSingleton1 Name : Singleton Class 1
testSingleton1 Object : com.home.project.test2.service.TestSingleton@63d19261
testSingleton1 Name : Singleton Class 2
testSingleton2 Object : com.home.project.test2.service.TestSingleton@63d19261
testSingleton2 Name : Singleton Class 2
Console의 출력 내용을 보면 "testSingleton1"과 "testSingleton2"이 동일한 인스턴스(com.home.project.test2.service.TestSingleton@63d19261)로 되어 있고 처리 결과가 같다는 것을 확인할 수 있습니다.